

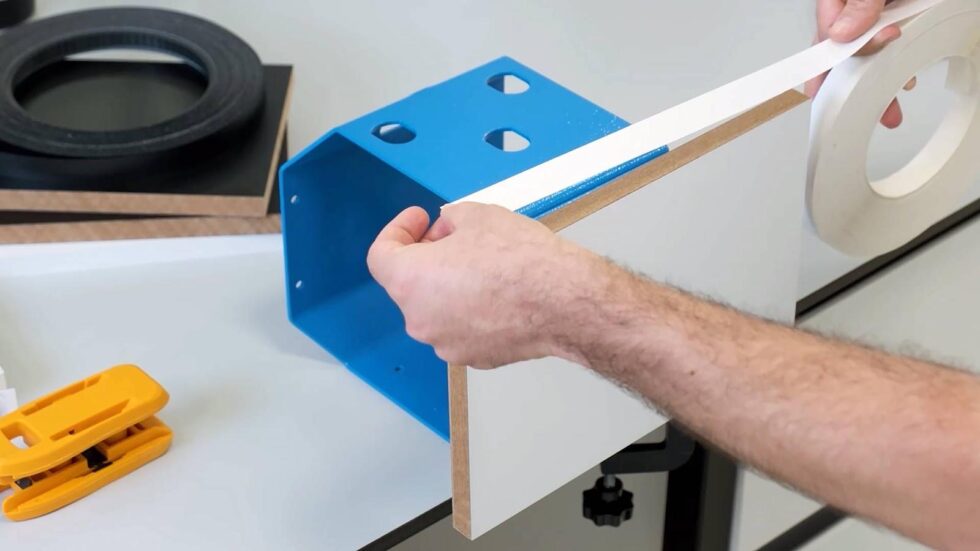
Applying pre-glued melamine edge band is a simple process that can be done with a few basic tools. Here’s a step-by-step guide on how to do it:
- First, make sure that the surface of the edge that you will be applying the edge band to is clean and free of any debris or dust.
- Next, remove the backing from the pre-glued edge band. Be careful not to touch the adhesive side of the edge band.
- Align the edge band with the edge of the surface you will be applying it to, making sure that the edge band is centered and straight.
- Once the edge band is in place, use a hand-held edge banding roller or a block of wood to press the edge band firmly onto the surface. This will help to ensure that the edge band is properly adhered and that there are no air bubbles.
- Use a sharp utility knife to trim off the excess edge band, making sure to keep the knife as close to the surface as possible.
- Use a fine-grit sandpaper to smooth out any rough edges or excess adhesive.
- Finally, use a clean, dry cloth to wipe down the edge band to remove any dust or debris.
By following these steps, you can easily apply pre-glued melamine edge band to your project with professional-looking results.

Leave a comment
This site is protected by hCaptcha and the hCaptcha Privacy Policy and Terms of Service apply.